
I made this Tut using PSP XI ,
but I think it can be made with another Versions too.
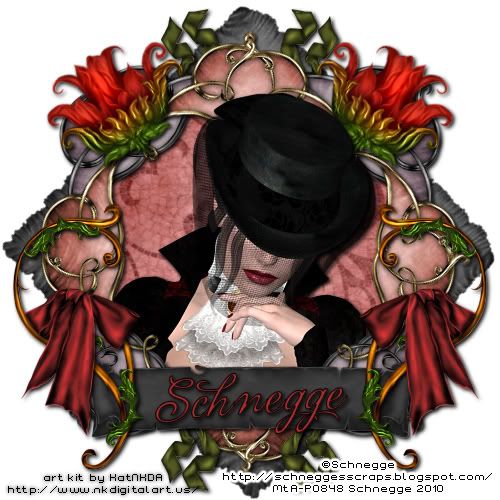
You´ll need for this Tut:
The PTU Scrapkit "Tulipe Baroque" from KatNKDA

1 Tube, the one i used is a Tube from me *lol*
©Schnegge
http://schneggesscraps.blogspot.com/
and You need a Licenze for using the Tube
Hope You understand the Tut, my English isn´t soooo good!
So let us begin ;)
At first two things:
After rezising you had to sharpen, so i don´t need to write it all time ;)
But when we have to rotate it will be sharpen after rotating ;)
At all elements i put a Dropshadow, which you want to use or if you want to use is your turn, i don´t write it in the Tut,
so if you want a Dropshadow feel free to use your own ;)
I used 2 - 2 - 100 - 6 - Black
Open a new image 500 x 500 Pixel - 72 dpi - fill with White.
Copy bg03 and paste as new Layer - Image - Resize 28% - Rotate Free - 45 Right.
Copy frame 07 and paste as new Layer - Image - resize 30%.
Copy frame 04 and paste as new Layer - Image - resize 27% - Rotate Free - 45 Right - put the Layer under the frame 07 - Layer - Click with the Magic Wand in the frame 04 -
Selections - Expand to 5 - Copy the Paper bg15 and paste as new Layer - Invert the Selections - Delete - Selections - None - put the Paper - Layer under the Frame - Layers.
Copy Your tube and paste as new Layer - put it in the Frame.
Copy scroll01 and paste as new Layer - Image - Resize 13% - put it below in the Middle on the Frames.
Copy emp14 and paste as new Layer - Image - Resize 28 - Rotate Free - 28 Left - put it on the Left Corner from the frame 07 - Duplicate - flip Vertical.
Copy emb12 and paste as new Layer - Image - Resize 15% - place it at the Left Side from the Frames so that the Top of the emb12 is in the Middle - Duplicate - flip Vertical.
Copy bow02 and paste as new Layer - Image - resize 15% - put on the Left Side on the Frame below the Middle (see my Pic).
Copy ribbon03 and paste as new Layer - Image - resize 7% - Rotate Free - 90 Right - put it below on the Right Side from the below Corner of the frame 04 on the Scroll -
put the Layer under the Scroll - Layer - Duplicate - Flip Vertical - Activate the Duplicated ribbon - Merge one down visible - Duplicate - Flip Horizontal -
put the Layer under the Frames and BG from Frames - Layers.
Put your Text or Name on the Scroll and type the Copyright on the Tag.
Save as png or jpg and you are finished with the Tag
You´r Pic is finished and i hope you have fun with it!
I think there are Tutorials look like this,
but this Tutorial i have not copy somewhere,
i have written it self and it´s mine!!!
© by Schnegge
06.01.2010
Keine Kommentare:
Kommentar veröffentlichen